What You Can Do with Claude in Lùmen: AI Laser Design Ideas & Workflows
Published: July 2, 2026
Describe it. Claude builds it. You engrave it.
Lùmen is a native macOS GRBL controller with a local MCP server, so an AI assistant like Claude can compose your laser design on the canvas — shapes, text, images, SVGs, layout and materials. €9.99 one-time, no subscription. 3-day free trial.
Once you've connected Claude to Lùmen over MCP, a conversation becomes a design. You stop clicking tools and start describing outcomes — “an 80 × 40 mm nameplate with a rounded border and the shop name centered” — and the shapes appear live on the canvas as real, editable items. This guide is the practical companion to that setup: what Claude can actually do for you, and the workflows that make it worth it.
If you haven't set it up yet, start with Laser Engraving with AI: How to Design with Claude — it covers what MCP is, how to turn it on, and why it's private by default. Here we focus on the payoff.
The one rule that shapes everything: design, not drive
Before the ideas, the principle that makes all of them safe: Claude designs, you drive the machine. Every tool in Lùmen's MCP server either reads state or edits the design on the canvas. Deliberately, none of them can move the head, home, set the origin, frame the piece, start or stop a job, or fire the laser — not even the low-power pointer. A prompt physically cannot “start the laser.”
That's not a limitation to apologize for — it's what lets you hand the tedious part to an AI without ever worrying about a runaway burn. You review the result, frame it, and hit Start yourself, behind the usual 5-second countdown.
What you can ask Claude to do
Think of it as five things you'd otherwise do by hand in the editor. All coordinates are in millimeters, and there are two layers: Engrave (drawn in blue) and Cut (drawn in red).
1. Compose artwork from words
Claude can add rectangles (with optional rounded corners), ellipses and circles, straight lines, open or closed polygons, and multi-line text with a font size in millimeters and an optional font. Each element lands on the Engrave or Cut layer — and on the Cut layer the style is automatically forced to outline-only, because a vector cut follows a path, not a fill.
“Add a 120 × 60 mm rectangle with 5 mm rounded corners on the cut layer, then put the text ‘Officina Rossi’ centered inside it, 14 mm tall.”
2. Bring in images and SVGs
Claude can import an image to engrave from a file path on your Mac — with per-image conversion options: grayscale, dithering or threshold mode, seven dithering algorithms (Floyd–Steinberg, Atkinson, Burkes, Jarvis, Sierra, Sierra Lite, Stucki), plus brightness, contrast, threshold and resolution. It can also drop in an SVG to cut. Multiple images coexist, and aspect ratio is always preserved.
There's a neat trick here. When you paste a photo into the chat, that attachment lives on the AI's side — the app can't reach it. So Lùmen adds an “engrave from clipboard” path: copy the image on your Mac (⌘C from Finder, Preview, or a browser) and Claude reads it straight from the macOS clipboard. It's the answer to “I pasted an image but Lùmen doesn't see it.”
“I just copied a photo — engrave it from the clipboard using Atkinson dithering, and scale it to about 90 mm wide.”
3. Lay out and repeat — the production angle
This is where an assistant saves real time. Claude can duplicate an element, align a group by any edge or center, distribute items with even spacing, and replicate one element into a full rows × columns grid (up to 400 copies) — ideal for a sheet of keychains, tags, or coasters. It can also center the whole design in the work area, or uniformly scale it to fit.
“Make a 5 × 4 grid of this keychain with 8 mm spacing, then center the whole thing in the work area.”
4. Get the material settings right
Claude can apply a built-in or custom material preset by name — so power, speed, resolution and passes are sensible for wood, leather, acrylic and the rest — or set those job parameters directly. Power is expressed as a percentage, so it scales correctly to whatever machine is connected. (Preset names are localized, so the reliable flow is always list the presets, then apply by the listed name.)
“List the material presets, then apply the plywood one.”
5. Let it see the work — and check before you burn
Claude isn't designing blind. It can request a screenshot of the work area — rendered from the model with the 10 mm grid, origin, blue engrave and red cut layers, and the laser head when the machine is connected — so it genuinely sees the layout and can fix it. And it can run a read-only pre-flight check that flags anything outside the reachable area or spilling past the work area, using the same geometry as the real job.
“Take a screenshot so I can see the layout — and validate it: is anything outside the work area?”
Four workflows worth stealing
Design with the AI, engrave it yourself
You describe an idea in plain words — a nameplate, a coaster, a sign — and Claude builds it: a rounded rectangle, centered text, aligned and sized. You watch it appear on the canvas, tweak the wording, then frame and start the job yourself. The AI does the fiddly layout math; you keep the hand on the controls.
Batches and series in one sentence
“Give me a 5 × 4 grid of this tag.” Claude replicates the element into a ready-to-cut sheet in one step. What used to be copy-paste-nudge, forty times, is now a single instruction — and it stays perfectly spaced.
A photo onto wood, end to end
You copy a photo (⌘C). Claude imports it from the clipboard, picks Atkinson dithering (which reads beautifully on wood), applies the plywood preset, then validates that it fits the work area. From “here's a picture” to “ready to engrave” without touching a slider — though you can still fine-tune every setting afterward. (For the deeper craft of photo engraving, see how to engrave photos on wood and the dithering algorithms compared.)
A conversational quality-control loop
Claude takes a screenshot, looks at the layout, notices a line of text creeping past the edge, and nudges it back into place — then screenshots again to confirm. It's design-review as a conversation: describe, see, correct, repeat, until it's right.
Who this helps most
- Makers who can't draw — you know what you want, not how to build it in an editor. Describing it is the whole skill now.
- Small-batch producers — grids, alignment and presets turn a fiddly repetitive setup into one prompt, consistently.
- Anyone iterating fast — the screenshot-and-validate loop means fewer wasted materials, because layout mistakes get caught on screen, not on the wood.
Safety is the feature, not the fine print
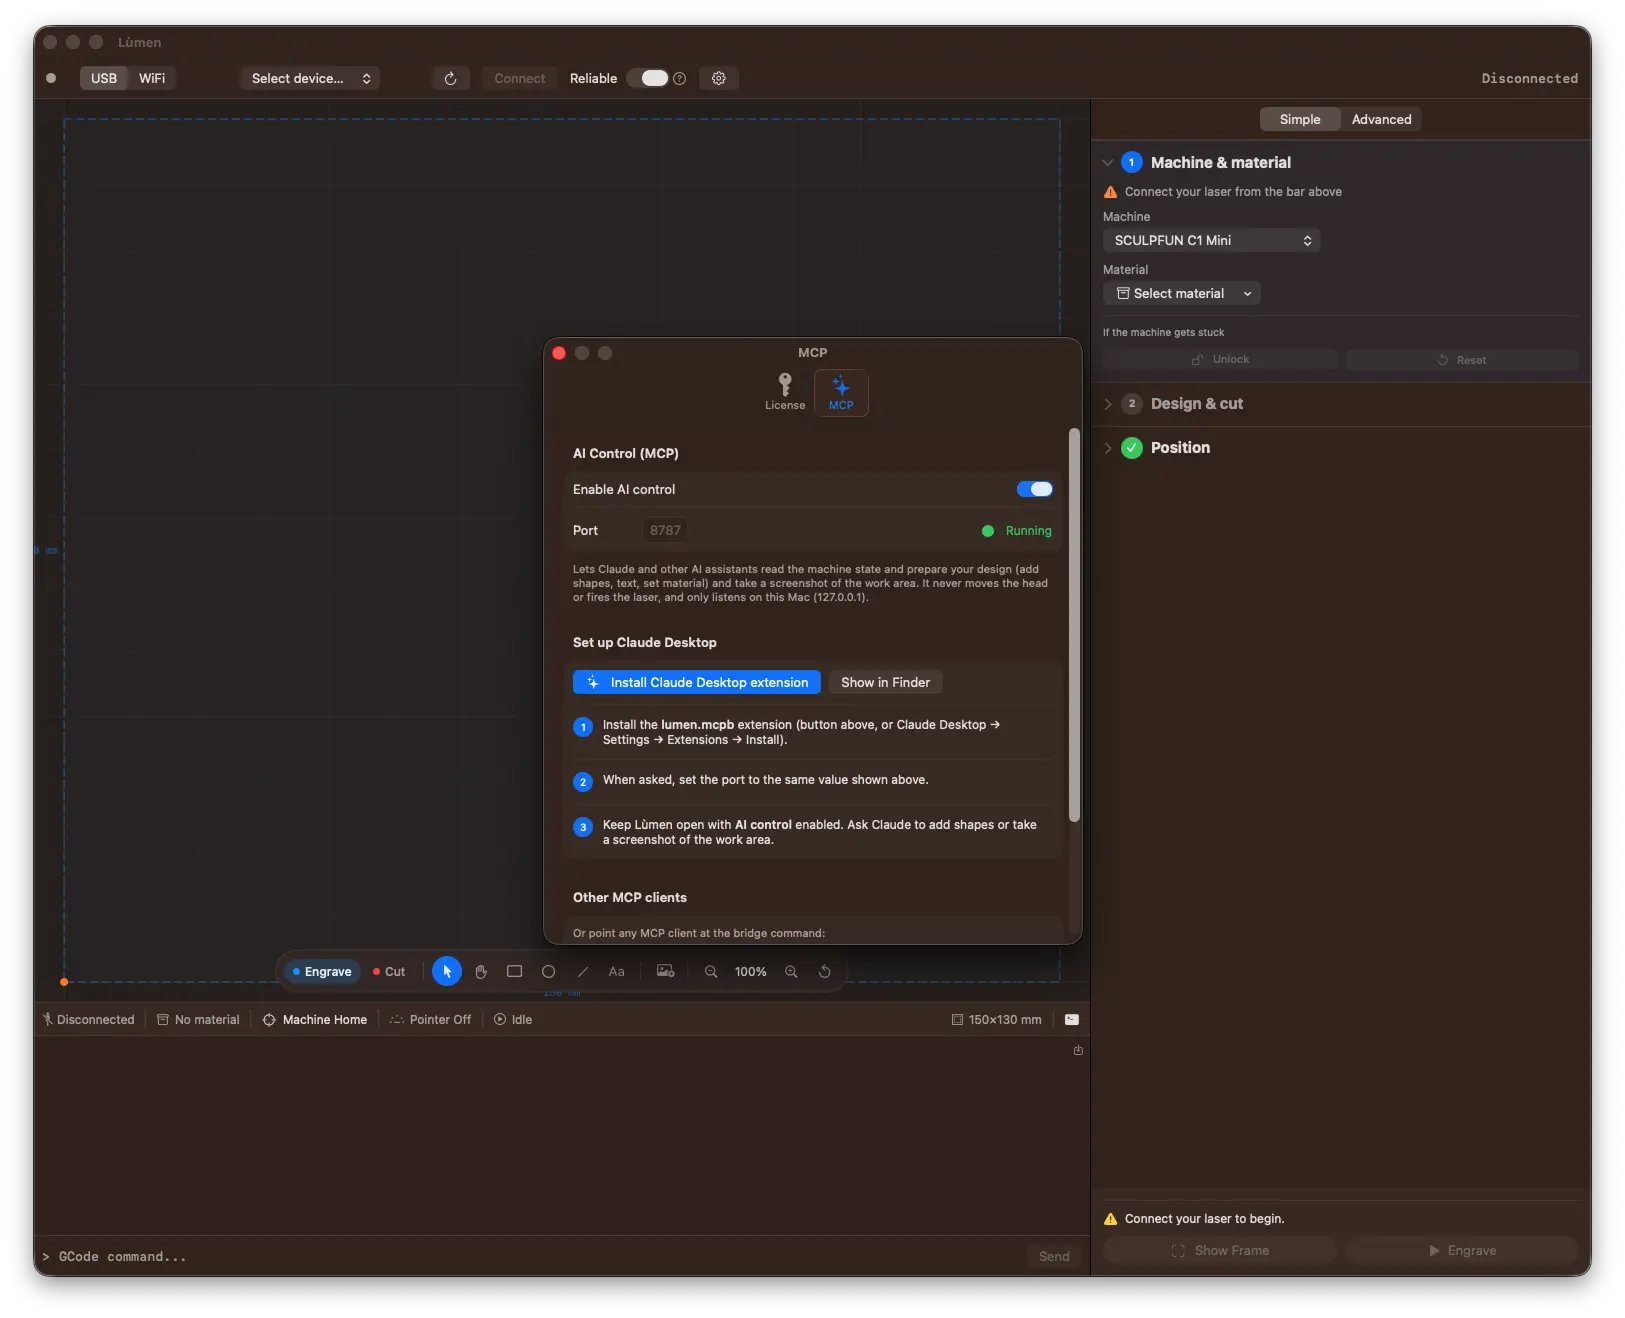
Because no tool can drive the machine, letting an AI design your job carries no risk of an accidental start. The MCP server is also off until you enable it, loopback-only (bound to 127.0.0.1 on your own Mac), and a licensed feature. The full picture is in the setup guide.
Get started
Lùmen is a native macOS laser controller with USB and WiFi connectivity, image engraving with 7 dithering algorithms, SVG cutting, a built-in shape & text editor, 18 material presets, a guided Simple mode, and an MCP server so Claude can help you design. It's a one-time €9.99 purchase with a 3-day free trial — no subscription.